In this article, I want to provide you with a simple way to secure your site with Let’s Encrypt.
Let’s Encrypt is a new Certificate Authority (CA) that provides an easy way to obtain and install free TLS/SSL certificates, thereby enabling encrypted HTTPS on web servers.
Let’s assume that your site is made using Yii2 php framework, as HTTP server uses Nginx, and Ajenti for administrator servers, and GIT.
I will describe it on the example of Yii2 advanced project.
Let’s think that you have 2 sites:
http://backend.example.com
and
http://fronted.example.com
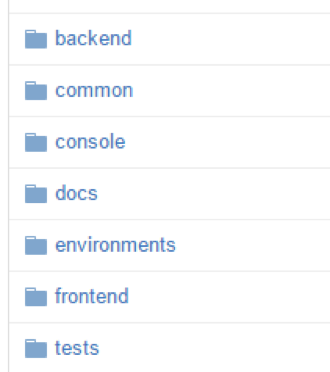
This is a typical structure of Yii2 advanced project:
Step 1
- Go to the folder /backend/web/ and create a folder .well-known;
- in this folder create .gitignore file with the following content:

Do the same thing in the/frontend/web/ folder
Step 2
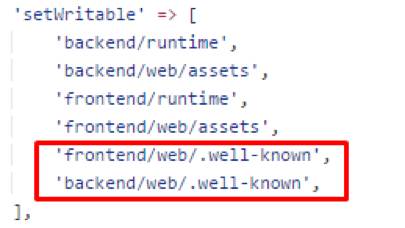
Open file /environments/index.php and add .well-known folder to the setWritable section. It should work like this:
Step 3
Commit and push your changes to the server.
—- All next steps should be done on your VPS ——
Run command in the root project folder
php ./init –env=YourEnv –overwrite=All
Step 4
Clone Let’s Encrypt
sudo git clone https://github.com/letsencrypt/letsencrypt /opt/letsencrypt
Step 5
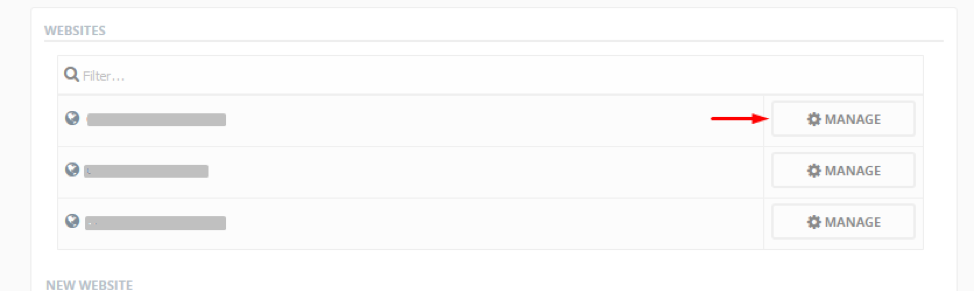
Go to your Ajenti dashboard
https://your_ip:8000/
Open tab Websites and click Manage
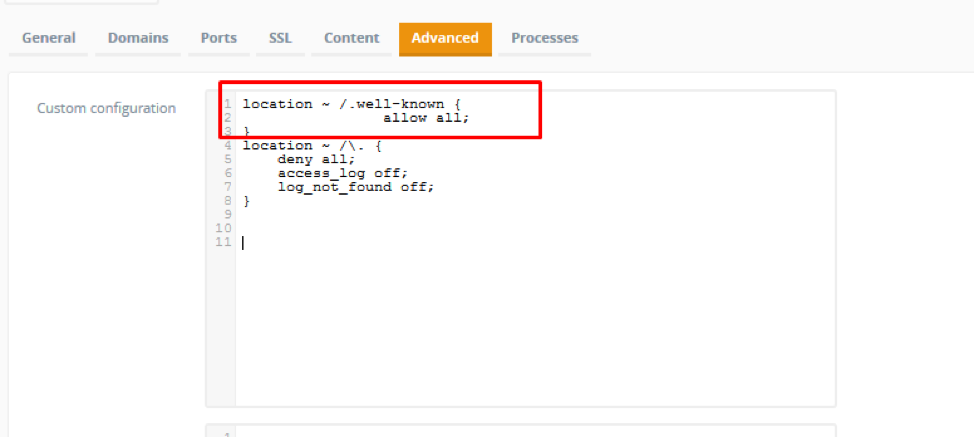
Open Advanced tab and add the following:
location ~ /.well-known {
allow all;
}
Here’s what you’ll get, as a result:
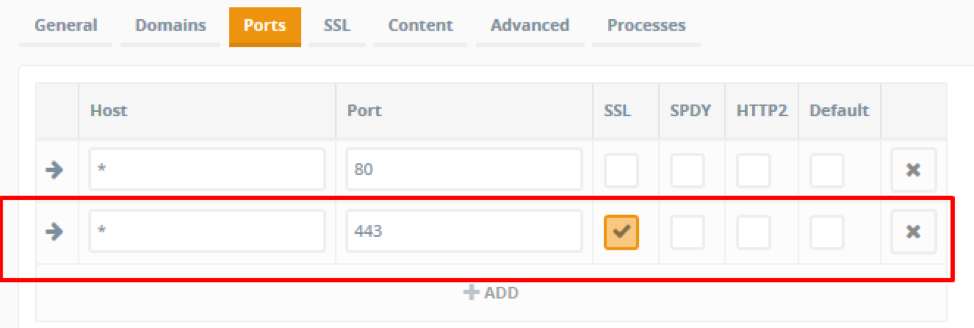
Step 6
In VPS console go to folder cd /opt/letsencrypt and rub command
./letsencrypt-auto certonly -a webroot –webroot-path=/path/to/project/backend/web -d backend.example.com
./letsencrypt-auto certonly -a webroot –webroot-path=/path/to/project/ fronted /web -d fronted.example.com
Following the prompt, enter an email address that will be used for notices and lost key recovery:

Then you must accept Let’s Encrypt Subscribe Agreement. Select ‘Agree’:

Step 7
Generate Strong Diffie-Hellman Group
sudo openssl dhparam -out /etc/ssl/certs/dhparam.pem 2048
Step 8
Go back to Ajenti panel
And add SSL files to your site configurations
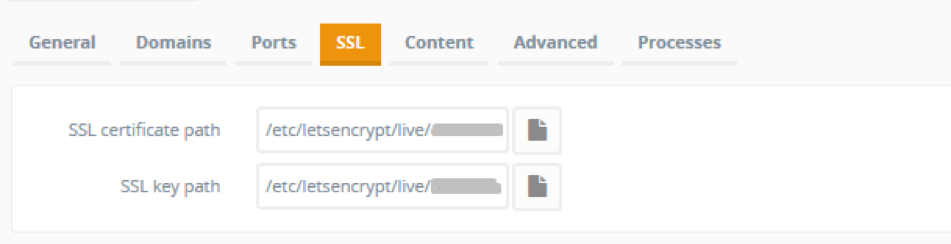
In the field ” SSL certificate path ” add path to the file
/etc/letsencrypt/live/backend.example.com /fullchain.pem
and in the field “SSL key path” add path to the file
/etc/letsencrypt/live/ backend.example.com /privkey.pem
Same for frontend.example.com site.
Step 9
Add CRON job, it is needed for Auto Renewal
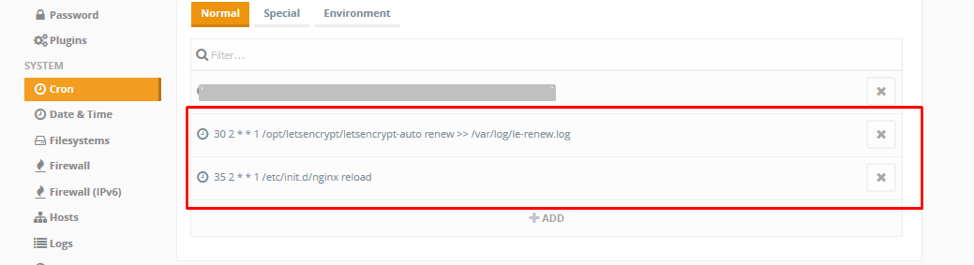
CRON job
30 2 * * 1 /opt/letsencrypt/letsencrypt-auto renew >> /var/log/le-renew.log
35 2 * * 1 /etc/init.d/nginx reload
Now you can visit your sites
https://backend.example.com
and
https://fronted.example.com
Enjoy 🙂